The eCommerce market is rapidly growing and requires much attention to stay ahead of the competition.
In this article, we will look at how to build an eCommerce store with WordPress and what steps you need to take to ensure the success of your store.
Why WordPress?
WordPress is not only the most popular CMS on the planet. It is also one of the most flexible and helpful platforms available. With millions of active users, thousands of developers and designers working to improve it every day, and an enormous selection of plugins and themes, there’s no better way to build your online store than with WordPress.
Step 1: Choose an Attractive Store Name
First and foremost, to build an eCommerce store with WordPress, your store name should be easy to spell and remember. It will help increase customer loyalty and even boost your SEO rankings.
Second, make sure that no one else uses the same domain name that you have chosen for your website. If not, they could confuse their site with yours or vice versa—which would be terrible!
Third, check if another company trademarks the selected domain name. If so, it’s best to pick another brand name instead of risking legal action against yourself (and who wants that?).
Lastly, don’t use offensive words in your store’s title because it will likely get censored by search engines like Google.
Step 2: Sign Up for a Hosting Provider
The next step to building your eCommerce store with WordPress is to sign up for a hosting provider.
You want to choose a web hosting provider that is reliable and has good customer service, as well as one that has a good reputation for security and uptime. If you’re not sure where to start, here are some tips:
- If you can afford it, go with managed hosting. It means that they take care of all the technical aspects of running your site so it never goes down. It can also save you time if you don’t have the expertise on hand yourself (or don’t have time to learn it!).
- Make sure there’s lots of room for growth. If at first, this seems expensive because the amount of space allocated will only accommodate a small number of products or customers at any given time but then expand rapidly later on when business picks up—it may still be worth paying extra upfront now rather than having unexpected downtime.
Step 3: Install WordPress

Previously, installing WordPress was a difficult and time-consuming process. Since then, it has become much easier to install WordPress yourself. However, if you’re not comfortable with this process or have a lot on your plate already, it can still be worth hiring a professional to install WordPress for you.
There are two ways to go about this:
- You can install a web server (like Apache) on your computer using WAMP or MAMP and then use that as an installation platform for the database software MySQL (or MariaDB). After that, all you have left is to install WordPress itself!
- Alternatively, many hosting providers now offer one-click installs for WordPress and other popular content management systems (CMSs). It means all you need to do is sign up for their plan, and they will take care of everything else behind the scenes when they set up their servers.
Step 4: Install & Configure WooCommerce
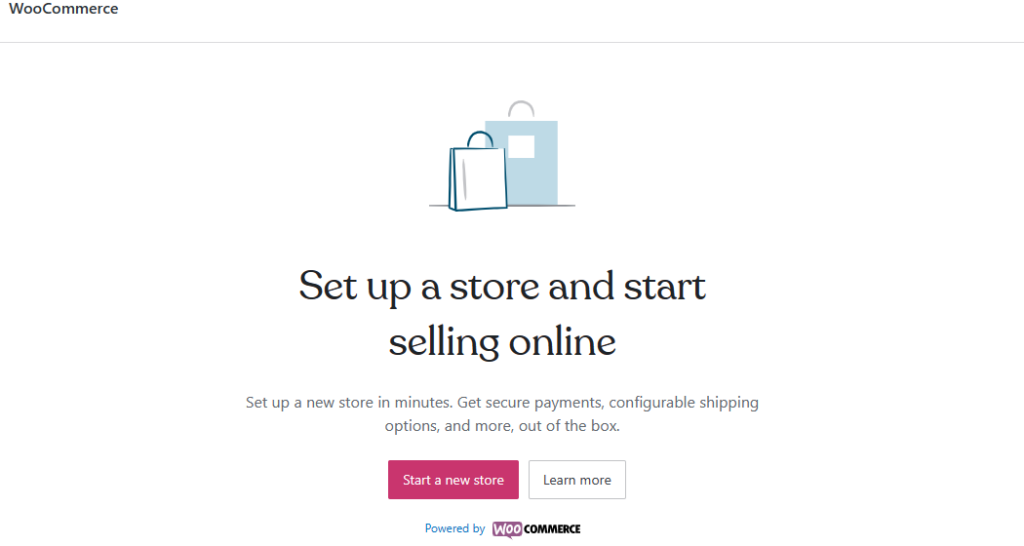
To get started, you’ll need to install the WooCommerce plugin. To do this, head over to your WordPress dashboard and click Plugins > Add New. You should see an option for installing the WooCommerce plugin in the search bar at top of the page. Go ahead and click it:
Once you’ve installed WooCommerce, you can configure it using their Dashboard—just look for a tab that says ‘Store’. From there, there are a few different things you’ll want to do:
- Enable taxes (if applicable)
- Setup shipping methods (if applicable)
- Add payment gateways
Step 5: Choose a Responsive eCommerce Store Theme

- You’ve got the store idea, you have the technology and now it’s time to find an eCommerce theme.
- Your theme should be responsive and highly customizable so that it works well on any device. (It should also be mobile-optimized.)
- When comparing themes, look for reviews from people who have purchased the theme and know what they’re talking about when they describe its functionality and usability. If any of them say this isn’t a good choice for beginners or if there is an unusually high number of negative reviews compared with positive ones, then this may not be the right storage platform for your needs.
- You’ll also want to make sure that whatever theme you choose has great support—you don’t want your site crashing after one week because someone else screwed up!
Step 6: Install Additional Plugins for SEO & Security
As you get closer to launch, there are a few things you can do to make your store more attractive to potential customers.
First, install a few plugins that will help generate traffic. For example, the WordPress SEO by Yoast plugin is an excellent tool for improving the search engine optimization of your site (and it’s free). You’ll also want to use something like Disqus or Lazyest Gallery so that visitors don’t have to leave the page when they want to comment on something or leave feedback about their purchase. Finally, if you’re using Woocommerce as your eCommerce platform, try installing WooCommerce Social Login which lets users log into the store using their social media accounts (e.g., Facebook) rather than having them create yet another username/password combination just for buying stuff on your website!
Finally, install some security measures such as WordFence and Sucuri to prevent malicious attacks on your website or blog from hackers trying to steal credit card numbers and other sensitive information off-site through phishing scams or other means.”
Step 7: Configure Your Payment Methods
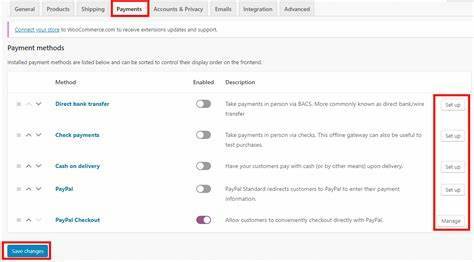
Now you have the tools to accept payments on your website! But before you can start accepting money from customers, you’ll need to configure one of these payment gateways: PayPal, Stripe, Authorize.net, Braintree and 2Checkout.
PayPal is used by a lot of people because it is free for personal accounts (if your sales volume per month is below $20K). It also has a very good brand name and many users are familiar with using it so this may be the best option for you if your store is selling low-priced items such as t-shirts or mugs etc. If your business relies heavily on receiving cash payments then consider using PayPal Express Checkout which allows customers to pay without leaving their shopping cart page.
Stripe works with all major credit cards so is ideal for selling physical products such as electronics or appliances where there is no option for recurring billing (e.g., monthly subscriptions). It also has built-in fraud protection features which help reduce chargebacks since they are secure transactions initiated through HTTPS protocol encryption which means that even if someone were able to intercept this data transmission they wouldn’t be able to access any sensitive information like card numbers etc.
Authorize Net offers much lower fees but requires more setup time before going live because each transaction requires manual approval before being processed by them first before being sent along to whichever company requested it originally.”
Step 8: Add & Upload Products on Woo Commerce
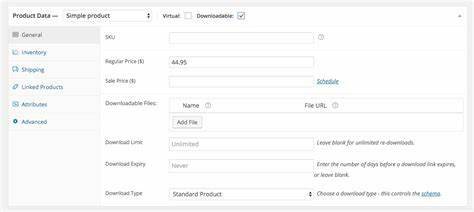
The next step is to add and upload products to your store.
Once you have created categories, tags, and products in Magento or Shopify, you will need to import them into WordPress. You can use the Import Export Tools plugin if you have a CSV file with your product information. If not, then follow these instructions:
- Go to Products > Add Product
- Enter a title for each item (it is what customers see on the front end) and then choose which type of product it will be (physical item vs digital). The most important field here is Product Data Source because this determines how all other fields are filled out for that product type. For example, if you choose “Magento” as your source for physical items but “Shopify” as your source for digital items then there will be some differences between those two types of products when displayed on your site!
Why Choose WordPress as Your eCommerce Platform
There are many reasons to choose WordPress as your eCommerce platform. Here are the top five:
- The first reason is that WordPress is free and open source, so you can build your store without any upfront costs.
- The second reason is that WordPress is easy to use, so if you’re new to building websites or don’t have a lot of coding experience, then this is going to be perfect for you—and if you need help along the way, there are plenty of resources out there for support (like us!).
- The third reason we think this platform is great for eCommerce sites is that it has incredible customization options—which means that you can make your store stand out from all the others online by changing its theme or adding widgets and plugins (more on those later).
- Fourthly—and perhaps most importantly–WordPress offers SEO-friendly features like JSON-LD schema markup which helps Google understand what type of content each page contains so they show up correctly in search results pages when someone searches something relevant like “blue shoes” or “red handbag” etc. It also ensures that all URLs across all pages are optimized so they’re easier for search engines like Google (and Bing) to find them too! It means more traffic coming through organic channels which equals more sales over time!
We hope this article has been helpful on how to build an eCommerce store. If you want to learn more about how to build an eCommerce site with WordPress, check out our in-depth guide on how to set up a shop with WooCommerce. You can also look at our other tutorials on SEO optimization and more!

Are you enjoying your time on JBKlutse?
Articles like these are sponsored free for everyone through the support of generous readers just like you. Thanks to their partnership in our mission, we reach more than 50,000 unique users monthly!
Please help us continue to bring the tech narrative to people everywhere through relevant and simple tech news, reviews, buying guides, and more.
Support JBKkutse with a gift today!